Showing posts with label glue. Show all posts

Saturday, January 7, 2012

Wrapping Paper Cards...

Last year for my birthday my sister, Marie, gave me several gifts and each of them were wrapped in doll themed paper.  She knows how I love dolls.  One of the wrapping papers had wonderful vintage dolls on it and she told me the story of the paper. 
You see, Marie is the most giving and kind hearted soul.  She cleans houses for elderly folks and also spends lots of time just listening to them and being a comfort.  One of her ladies knew that Marie was meeting me for my birthday (this was last August) and that I love dolls.  That sweet lady who doesn't even know me told Marie that she had some wrapping paper and went to get it.  It was a roll of vintage wrapping paper with these amazing dolls all over it.  How very thoughtful. 
So when I met Marie for our get together and she told me the story I decided that I would make some cards with the paper.  I made two sets...one for Marie and one for the lady who gave her the paper.  I made each card different and sometimes added lace or paper doilies.  I lined each envelope with pretty paper.  Then I tied the sets with ribbon and gave them to Marie for herself and to pass along to her client. 
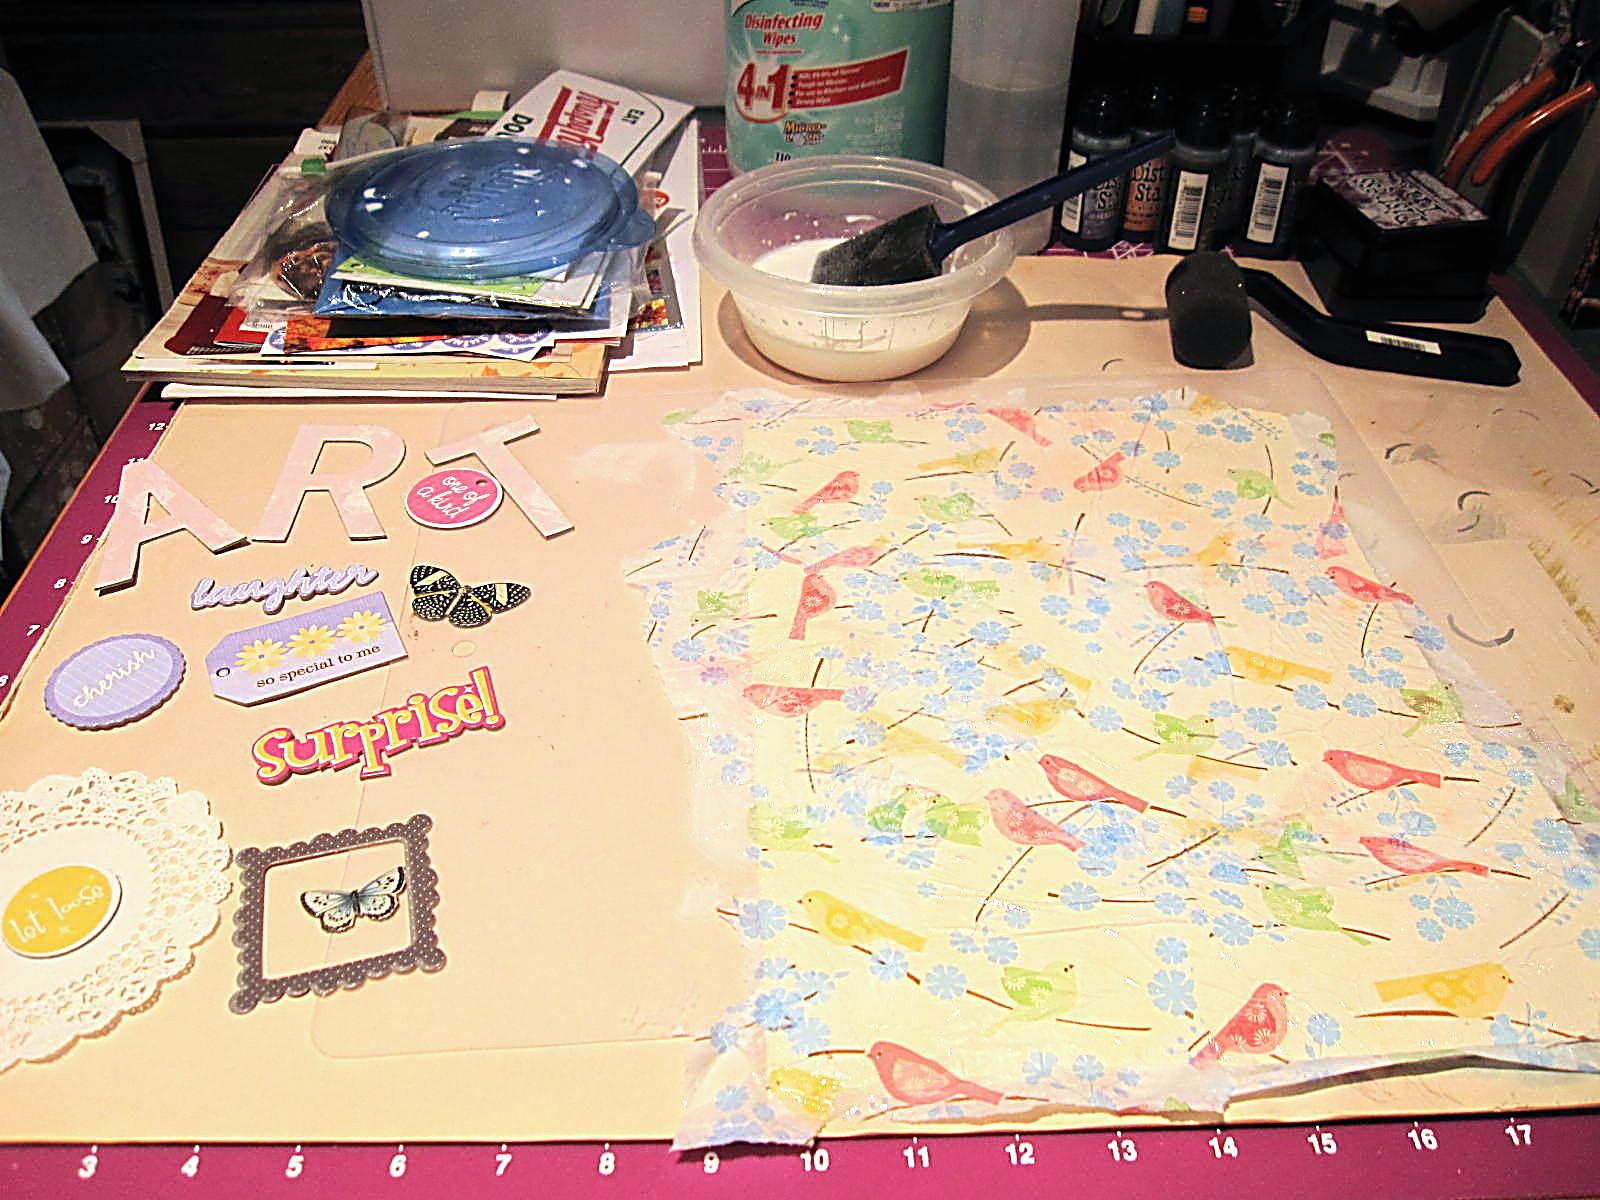
This is such an easy way to use paper that would otherwise be thrown out.  I like to crumple the paper and give it a real worn look with all the wrinkles and character. Wrapping paper works really well because it is lightweight and easy to work with.  You can tear around the image for one look or cut around it for another version.  If tearing...remember the paper torn off away from you will leave a clean edge and the paper torn off towards you will leave a white edge.  That can also be part of the look for the finished cards. Try using tissue paper on cardstock.  You can either buy blank cards and envelopes or you can cut card stock and use that for the cards.  Envelopes are fun and easy to make from templates or just buy blank envelopes at the supply store. 
Hmmm...gifts for birthdays, holidays or next Christmas.   Make a few sets here and there and put them into that gift cupboard for just the right occassion. 
P.S.  It is always extra nice to stamp handmade on the backs of the cards.  I don't date them from experience of misplacing them and finding them years later...not good to give an old dated card set that has no vintage value. 
Do you make and give handmade cards?  Do you premake cards and keep a supply on hand for all those occassions that pop up at the last minute? 
Now I should do as I say and play in the studio making some card sets.
Joyful January 2012 to everyone...

Saturday, November 12, 2011

Bottlecaps and Baking...

 This is a simple and easy gift item I have been making.  Bottlecap necklaces.  Unfortunately I did not contain my making to the studio and therefore I have glittered my entire kitchen table and subsequent wood flooring.  A tablecloth on the table hides the telltale glitter but what about the floor?  I have tried everything to clean it up.  Well at least it is pretty. 
I made a bunch of these for the upcoming elementary school sale.  My time and supplies are merely my donation as the sale price of the item gets donated to the school for expenses to help the kids. 
 Meanwhile this is my front yard.  A huge irrigation project the county is doing.  There is a 1920s water canal system from the gold rush days and current technology is replacing the old metal water pipe with larger concrete carriers that are dug down deep and tunneled under our road.  This is a very controversial project and my neighbors are mostly against it and make it difficult for the workers.  My husband and I realize progress must happen and we have been very helpful even though it impacts us the most as it is on our property.  Of course the NID (Nevada Irrigation District) does have easements to the canals.  We the property owners really have no say so in the matter.  Some have sued and gotten monetary settlement but that merely delays the project and increases the costs to all of us. 
So I spent a day this week baking four dozen cookies to give to the work crew.  You should have seen their eyes light up when they saw the cookies.  One of the concrete truck drivers took a big bite and immediately said, "These are Snickerdoodles!" and took another bite.  Why yes they are!  My very favorite cookie which I learned to bake when I was very young and visiting a relative in a lovely old two story farm house.  I had given the box to the foreman and he was eating one and all the other work crew were way on the opposite side of a huge dug out hole.  When they saw the cookies they literally came running around the huge hole and all the equipment to get to the cookies all while saying, "Thank you!" to me with big smiles on their faces.  Oh it felt so good to have spent a day baking and making the boys happy. 
I continue to make my lists and check them twice.  It seems that for each item I check off I am adding several more that need attention.  Why is this the way it goes? 
Blissfulling sewing, beading, glittering, gluing and getting ready for the holidays...

Wednesday, September 28, 2011

Faux Beeswax Pages...

In continuing with my Discovery Journal I am making at the expert guidance of Roni...Ink Stains fame this is my faux beeswax attempt.  I used a manila folder and tore it down the middle giving me two pages to work on.  In the future...yes I will be doing this technique again...I will select a sturdier base to work on.  I think I would like this effect on a paper mache store purchased container like a hatbox.  My pages warped and turned out a bit stiff and therefore do not turn easily in my 3-ring binder. This first photo is sort of my layout.  I am using tissue, paper lacy doily and lots of chipboard pieces.   
 On this page I am using the same materials and adding a torn magazine photo.  This photo shows the glue process.  I used a white Elmers glue and it takes quite a while to dry as I really gave everything a good coating to be certain they were adhered.  As my pages warped I would press down the items and apply more glue. 
 Now I have added and glued a layer of dressmaking pattern paper to the page.  This also helps hold down the chipboard objects.  I did also use a foil top off a wine bottle you can barely see in the bottom right corner.  Everything appears cloudy now because the white glue has not dried but will eventually be clear. 
Here is a page all dry and stuck down.  I think the dressmaker pattern tissue gives the pages just the right tone that resembles warm beeswax.  The page is slightly warped but that is not a problem for this piece.  Please remember I am practicing a new technique Roni is teaching us.  I do not expect perfection from myself in this journal as that is what normally keeps me from attempting to make things. 
On this dried page I have added the crowning touch of Perfect Pearls and hand rubbed it in.  I did not have the same color as Roni so I used what I had.  That is part of the fun of this Discovery Journal techniques class.  We are using what we have so we don't have to rush out and pay big bucks on new supplies we might never use again.  I truly appreciate that about Roni and her style.  My art budget is very tight these years and I am thrilled to be able to make art with what I have in my cupboards. 
Thank you once again Roni.  I really like this faux beeswax and can see it used again in my gift giving. 
Now I can begin on the next Discovery technique.  Please stay tuned...
Are you following Roni and making your own Discovery Journal?  I am super glad I am doing this.  It is expanding my skills.
Terrific rest of the week...
September surrenders to Autumn. 

Tuesday, June 21, 2011

Rescued Chair...

This little chair was just waiting for me to rescue it. I was at the local Hospice Gift and Thrift and in the parking lot was a bunch of used...very used pieces of furniture. I saw this little chair and heard it calling to me. Sherrrrryyyyyy...
Of course I had to go take a look. And I always give furniture the wiggle test to see if it is too wonky. This little chair was only slightly unsteady. I knew Mr. C could strengthen it for me. The price? No way...$4. So I go inside and tell the clerk I want to buy this chair. She says are you taking it home today? Well of course I am...we have bonded and I can't leave it behind.

This is the label from the underside seat of the chair. It is solid wood and made here in the USA. I am now really bonding with this chair.


Here it is on Mr. C's workbench. All that needs doing is a little wood gluing to the spindle that connects to the chair back. How easy is this? Done and all better. Thank you Mr. C.

Now maybe a coat of white paint. After lots of sanding and priming and painting...


More sanding and painting. Thank you again Mr. C. Of course we had to wait until June for winter to end. I bought little chair in January.


And now little chair is beautiful in her new white coat and she is so happy to reside at the kitchen desk where she can be part of the family every day.

She is a very comfortable little chair and I am so glad she called me over to rescue her.

By-the-way...when I told the clerk that of course I would be taking little chair home with me right then she announced that the price was half the tag price. What?!! Little chair only cost me $2 and I am completely over-the-moon happy with her.

So sometimes being creative and crafty is not about fabric or beads or paper...sometimes it is the act of rescuing a worn out chair that someone disposed of and giving it new life with a fresh coat of paint and lots of love.

What have you been working on lately?


Tuesday, November 16, 2010

Mailable Holiday Gifts...

Here is a very simple gift that is mailable and unique. It is also very affordable as most of the items were purchased at the local dollar (dollar twenty-nine) store. Items used:
flat canvas board, scrapbook paper, lots of glue or gel medium, felt or foam oversize flat ornaments, buttons and thread, ribbon, blank cards with envelope, paper punches if desired and more glue. Absolutely every piece of the 12" x 12" scrap book paper is used on this project.
Have fun with the colors and embellishments. This set I used pink buttons with green thread to enhance the colors in the paper. The card is adorned with the scraps of paper, the envelope is lined with the scrap of paper and a punched recycled Christmas card circle embellishes the card.

This set is soft in colors of white, green and light blue. All of this mails easily in a padded envelope. As you can see the choices of colors and style combinations are endless. The canvas is hung by a ribbon which is glued to the back and then covered with holiday stickers.

Here is another option and design. I love the punched out hearts on the card as they mimic the point on the felt ornament. The photos do not accurately show the glitter which is part of the paper. You could also add glitter to this project if desired.

One more to show. This paper and foam snowflake are so perfect together. Even the ribbon hanger has snowflakes printed on it. This set might be my favorite.
I hope this is something you try making. It is easy to do. You will need a lot of glue or gel medium and there will be drying time. I didn't rush this as I wanted to be certain nothing sticks during mailing.
As I select each set for mailing to family and friends I shall personalize the back with their names and the date.
Is this something you think you might like to make? Can you imagine other holidays or celebrations using this technique?
Happy Holiday Creating...


Thursday, September 16, 2010

Happy Hearts...

In my sleeping hours I had an idea and decided to try it. It involves a large and small heart punch (I love the new squeeze Fiskars punches), some metallic paint chips cut from an idea booklet, some glitter string, glue stick and a piece of cardstock. Very simply punch out lots of hearts, both large and small, and then begin gluing them in a heart shape onto the card stock. Add some strings and a small bow to represent a balloon.
Then the cardstock was mounted onto a piece of mat board in a contrasting color. This was made to celebrate Miss Lindsay's recent birthday and let her know she is very special. After the photo was taken we (my Saucy Chick girlfriend, Lorraine) personalized it and signed it.
So with a small amount of supplies and a lot of fun and laughter this was created with our hearts and hands.
Don't you just love paint chip samples? Can you honestly walk past them in the store and not collect just a few colors for your crafting? There are so many colors and choices now days it is impossible not to find some you like. Then to use them is sweet inspiration.
I do hope this gives you some inspiration and possibilities for gift giving. I would love to see and hear about what you create with punches or paint chip samples or paper or whatever you fancy.
Happy creating...

Wednesday, April 28, 2010

Winter Hijacked Spring...Again

The rain is so refreshing and clean and clear. I really do like it. However, Winter has hijacked our Spring again. Here it is April 28th and no sunshine again. When I took this picture it was just between hail and snow and a white layer on the ground. Snow level is 4000 feet today and we are 3400 foot elevation. The Sierra's are definitely getting another batch of snow. This rain is so good for our water table. We are on our own well so we are thankful for the rain. It also means we don't have to turn on our drip irrigation system yet.
Welcome refreshing rain.
I was going to post pictures of my clever creative artistic bookmarks I made however I seem to have some little (or big) gremlin who deleted the two pictures I needed. Afterall they were sandwiched in with Mr. Createology's car project photos so I can easily see how a couple of "craft" photos were not needed. LOL
I was going to show you how I use an old catalog for my gluing station. You probably already are doing this or know about this but just in case you aren't using this trick here it is. Get an old catalogue and instead of throwing it out just yet, use the pages for your base to apply glue to your pieces of ephemera. As each page gets messy just turn it over and you have a new clean page to work on.
I recycled some propaganda (so mysterious sounding) mail I had received and cut it into bookmark sized strips. It had some lovely flower photos on one side so I merely embellished around the photos. Some old sheet music, some glittery butterfly stickers, some text and done. The other side I glued my vintage wrapping paper to cover the strip. Some corner punches, a single hole punch and some ribbon finishes and a bookmark ready for mailing and using.
Very simple and kept some junk mail out of the landfill. As for my glue catalogue it takes a long time to fill every page with glue. Once filled you can use it for another art project.
P.S. I couldn't retake the photos because I mailed out all the bookmarks I made.
Do you have a handy tip for gluing paper or such things?

Tuesday, April 6, 2010

April = Letter Writing Month...

April is Letter Writing month. For those of us who still get excited over snail mail this is a perfect opportunity to send and get mail. I know how frustrating and expensive mailing something can be at the post office. I have been constantly disappointed by postage rules I have never heard of. However, none of this will stop me from sending mail. So in the handmade theme of my life I have made some cards to send.
Very simply I took 3 pages of coordinating 12" x 12" scrapbook papers, 9 pre-folded cards with envelopes, glue stick, pencil, ruler, tape and my favorite heart punches. I lined the envelope flaps with printed paper, punched hearts to embellish the front of the envelopes and kept them very flat and smooth so the postal company "machines" can do their jobs without my having to pay the additional 20 cents for "handling". I am being optimistic on this as I have not mailed these yet. I may still get stung.
For the cards I merely cut and taped and glued papers to the fronts along with fun hearts and then embellished some of them with my Sharpie markers. Once again I am going with the flatest dimension possible. I am also trying to keep the overall weight very minimal. It should not cost me USA 44 cents plus 17 cents plus 20 cents to mail one simple card! That is 81 cents and what are they thinking? For my local recipients I can afford to drive it and hand deliver it myself...except that would spoil the fun of looking in the mailbox. :o)
On the back of each card I stamp my favorite little stamp I have owned for decades:
"When you care enough...you make it yourself!"
Happy letter writing this month and always.
Can't you just see fine ladies in their beautiful dresses sitting at their fancy writing desks actually writing letters and sending them across the country when it took weeks to deliver. Can you imagine using a quill and ink bottle? I am afraid I would spill the ink and make a huge mess.
To this day I still love a scripted letter from the days of yore. I appreciate those who do calligraphy as it is so beautiful and follows in the old traditions.
Hmmm...are you going to make some cards? Write some letters? Send some mail? I am.

Tuesday, February 9, 2010

Valentine Hearts are in the mail...


These are some fun Valentine Hearts that were in progress when this photo was taken. These are now in the mail on their way to new homes. They had to hurry so as to be enjoyed before Valentine Day is over.
I of course would wear them anytime in the year as I love hearts and glitter and bling. I also wear lots of red or pink during the entire year so that works for me too.
These were extremely simple to make. Unfortunately they took a lot of hours and days to complete. It was fun to see how they came together. There are punched hearts from playing cards, eyelets, rhinestones, glitter, glue, dimensional glaze, beads, charms, fabric beads and ribbons. The time element was waiting for each glue or glaze to dry completely.
Patience is not easy for creative processes at all times. We are also having lots of wet soggy days so no heat or sunshine to help the drying phase. I know I could have used the hair dryer or the heat embosser. Luckily I did begin making these way in advance of my mailing date. Sometimes it is good to plan ahead. LOL
I have some additional ideas for ATC's in the Valentine theme using some, if not all, of these elements. Of course I have not started these and they would need to be dry and ready for giving this Sunday. No mailing of these at this late date. :o)
I also have another idea I will show after I have given them to some friends.
What are you working on for your Valentine's this year?
Happy Hearts to all and keep creating...

Tuesday, March 31, 2009

Studio welcomes me...

This is my studio and it is welcoming me with open doors! I feel a spring in my step just knowing I can get into making my creative messes. As you can see I do have a lot of sorting and organizing and putting away to do but at least the door is open.
I usually don't spend much time in here when the weather is cold and nasty as I am not motivated unless the sun is shining and I am toasty warm. Yes, of course I have heat and air conditioning in my studio but that is not the same as sunshine coming in through the windowed french door.
Today I spent a bit of time working on a birthday gift for my sister. I actually have two sisters with April birthdays. They were born 12 months and 12 days apart and spent their younger years being treated like twins by our mom. Of course both of them are younger than me.
I also put some paint on my new journal I am working on. I am inspired by the Somerset magazine "Art Journaling". I have no artistic drawing or painting skills however I do have a love for colors and collage. I realized while reading the magazine that I never even doodled in my life. While growing up I was not allowed to doodle, or twiddle my thumbs for that matter, because it was considered a waste of time and showed no intelligence as per my mother. Yes, now I realize that she was "different".
Actually my mom was very creative and was always crafting, sewing, cooking, canning and talented. She was left handed and I think that is why she was so creative. I am right handed as a side note. One year we all went collecting pine cones on our property in the mountains and then mom spent the summer wiring all of them together to place around the outside frames of the windows of the cabin. I loved the look of them. I remember her hands being pricked from the sharp pine cones but she perservered and completed every window. I think there were at least a half dozen on the cabin front.
I learned lots of crafting and sewing from my mom. Thank you mom. She is flying in heaven.
So sometimes I struggle with artistic endeavors but I am not giving up. I think I can learn to doodle and hopefully draw even at this stage of my life. I just need to remember that there is no perfection and that everything is a learning experience. I certainly have lots of artful supplies as I like to be prepared for whatever when it hits.
My wonderful husband built my studio and carefully measured every nook and cranny and counted all my storage containers to build them in perfectly and mainly to be organized as he HATES clutter. Nice try honey...I love to squeeze more stuff in every space possible. He even put an electrical outlet in the ceiling over the island for glue guns and such so I wouldn't get tangled in the cords. He made certain that I have doors that close off the studio and no one ever has to see my mish-mosh.
I really love my studio and having my very own space to be creative in. I think I shall go and splash some more paint on some paper and plan the next step to the birthday gift.
Happy creating everyone and thank you for letting me ramble on.
Saucy Chick Sherry